Skip to content
 DDPAI » Product Manuals » X5 Pro
Product Overview

- Front recorder camera
- Holder for the main device
- Parking monitoring indicator light
- Function button
- Reset button
- Micro SD Card slot
- Type-C port
- Speaker
- Operating light
- Microphone
- Lens angle adjustment handle
Pacakage Contents
- Front camera
- Rear camera
- Mount
- Power cord
- Rear power extension cord
- Instruction manual
- Electrostatic sticker
- 3M sticker
Installation
1. Disconnect the power supply of the vehicle.
2. Take out all wires inside the packing box and locate the power cable and the terminals include:
1) Red ACC wiring terminal
2) Yellow VCC wiring terminal
3) Black GND wiring terminal
3. Arrange the power cable to the fuse box along the front windshield, A-pillar, compartment in the driving room.The wiring layout is shown as below figure. The front camera should be mounted and fixed on the front windshield, somewhere around the rear view mirror.The optimal mounting area is shown below.
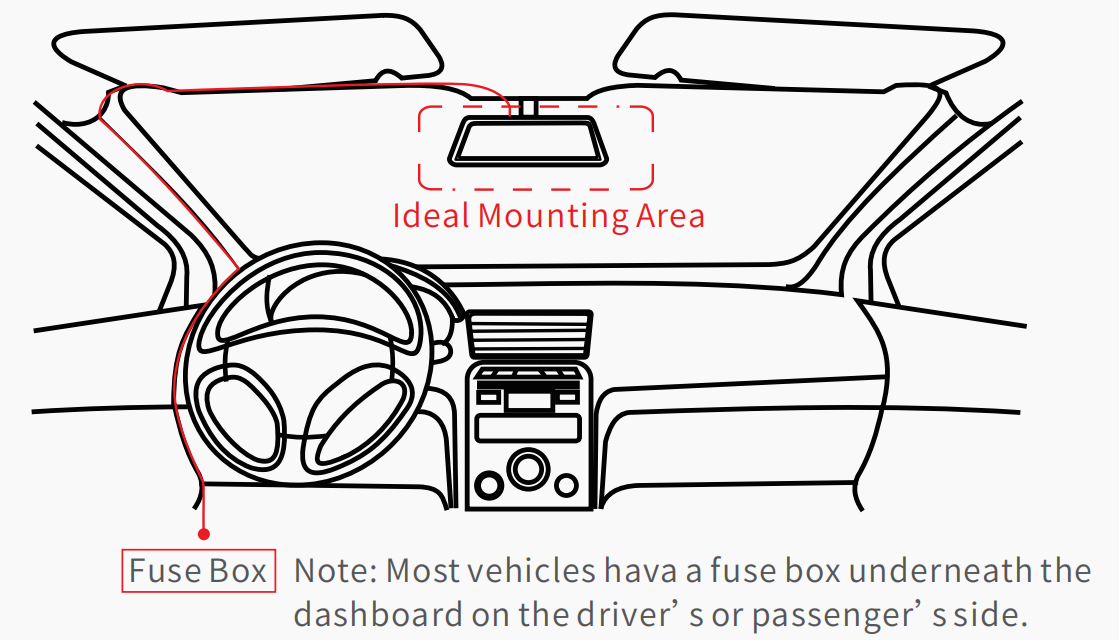
4.Connect black line (GND) to the ground wire inside the fuse box of vehicle.
5. Connect red line (ACC) to the +12VDC power supply for ignition control in the fuse box.
6. Connect yellow line (VCC) to the 12VDC power supply inside the fuse box. The power supply is always on and will not be controlled by the ignition.
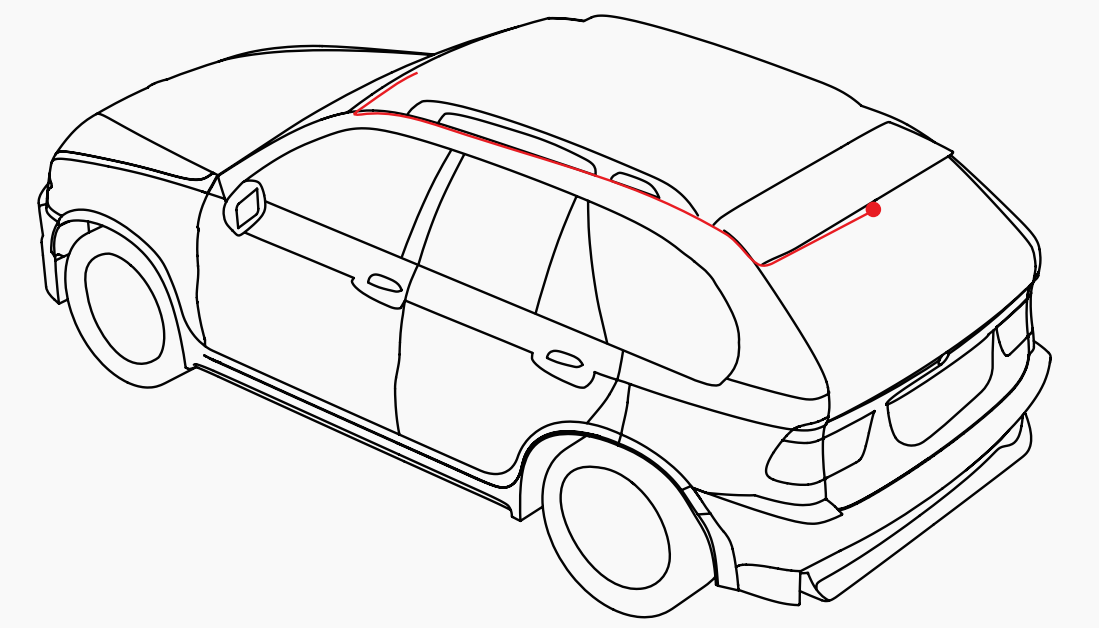
7. Connect the black rear signal line to the rear camera, and then arrange the wires to the rear lens position of the vehicle as shown in figure. The installation position and wiring layout of the rear camera is shown in below figure.
Indicator
- Operation mode:Blue light is on
Event video/Emergency video/Photo video: Blue light rapidly flickers
- Abnormal state/upgrading: Red light rapidly flickers
- Not recording/U flash disk mode: Purple light is on
- Test mode: Purple light flickers
- Parking monitoring state: Red light is on
Install Ddpai App
For Android/iOS phones, search for “DDPAI” in the Google Play Store or Apple App Store. Download the App and install it on your phone.
App Instruction
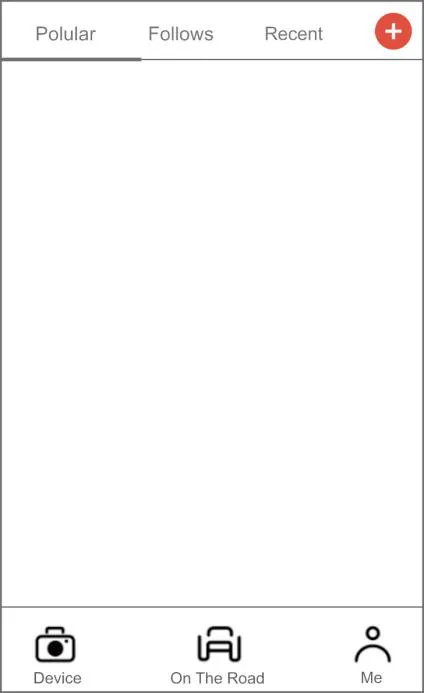
On the Road
When your mobile phone is connected to your mobile data network or home Wi-Fi, you can find nearby users, see the newest activities, user experience, installation tutorial etc from here.
Tap on the + icon to share pictures or videos on social media platforms like Facebook, Twitter etc.
Me
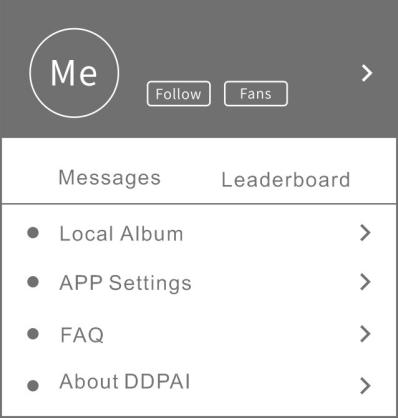
- Local Album: You can View images, videos and emergency clips, you also can edit and share them from here.
- APP Settings: Set the language, time format, App Storage Management, and so on.
- FAQ: How to use the Dash Cam.
- About DDPAI: Update firmware, contact us, information about the Dash Cam.
Device
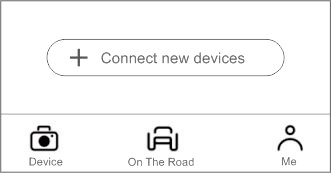
After connecting your phone with the DDPAI Dash Cam Wi-Fi, you can add/delete Dash Cam, preview, playback, download, snapshot, and so on from here.
Pair Smart Phone to Dash Cam
- Keep the Dash Cam and mobile phone within 2.5 meters.
- Launch DDPAI App, tap on ”Device > Connect new devices”.
- Choose your DDPAI Dash Cam from the network list (For Android system, App will start to search Dash Cam network automatically. For iOS phone: turn on WLAN from “Settings ->WLAN”). The Dash Cam’s default SSID (or Wi-Fi name) is DDPAI_X5 Pro_XXXX.
- Enter the password (the default password is ‘1234567890’).
- Enter DDPAI App, wait a few seconds until the preview screen show.
Preview
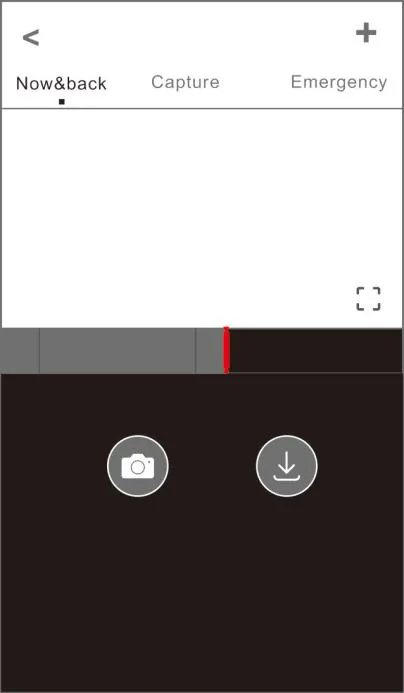
- 1.Open the DDPAI App, and add your Dash Cam.
- 2.Select ”Device > Entering” tab, this will bring you to the preview page.
Rotate your smart phone or press expand [ ] icon, turn the preview screen to landscape mode.
Playback
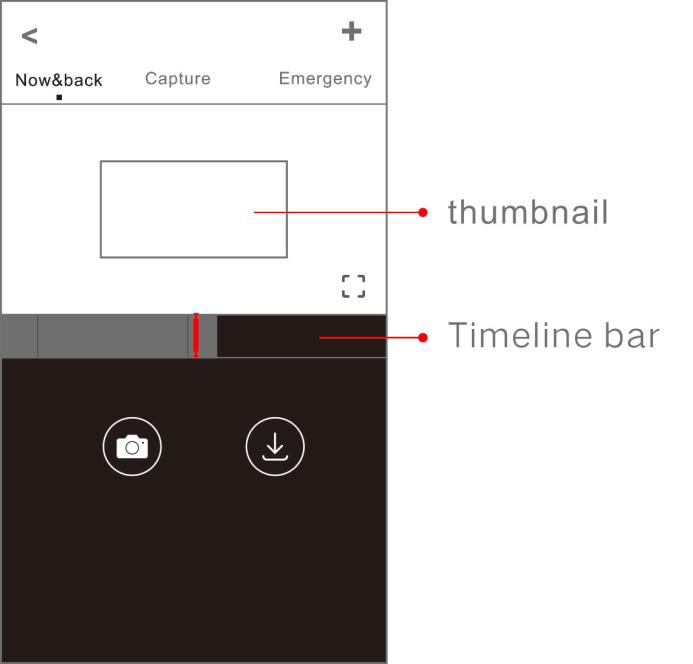
Tap and left/right drag time line bar at the screen bottom to create the starting point of the recording you wish to preview, then tap on thumbnail
when you have made your selection, or wait for 5 sec for buffering, now you can watch the history recording.
Download VideoFiles
- Tap and left/right drag time line bar at the screen bottom to create the starting point of the recording you wish to download, then tap on thumbnail when you have made your selection, or wait for 5 sec for buffering, to enter the download start screen.
- Tap onfrom preview screen to enter the download interface.
- After the video has finished downloading, click “Complete”.
Upgrade App And Firmware
Specifications
Product name: Dash cam
Product model: X5 Pro
Product size: 102.8*64.6*33.3mm
Product specification: 12V/1A
RAM: 4Gb
GPS: Built-in high-precision sub-meter GPS module
G-Sensor: Built-in 6-axis Motion Tracking device. Variable sensitivity G-sensor auto detects sudden shake/collision and emergency locks the footage to “Event File” to prevent that video from an overwrite.
Storage: Built-in eMMC with a storage capacity of 32G, external Micro SD Card can support 128G at the maximum (adaptive to Class 10 above)
Wireless module: Built-in 5GHz Wi-Fi Wireless module
Picture pixel: front 3840*2160, rear 1920*1080.
Video: the front can support 2160P@30fps or 1080P @90fps, the rear can support 1080P@25fps IFront lens: 7 optical lens, FOV 140°, F1.8 aperture
IRear lens: optical lens,FOV 125°, F2.0 aperture
Fcc Statement
This device complies with Part 15 of the FCC Rules. Operation is subject to the following two conditions:
(1)This device may not cause harmful interference
(2)This device must accept any interference received, including interference that may cause undesired operation.
RF warning statement:
The device has been evaluated to meet general RF exposure requirement. The device can be used in portable exposure condition without restriction.
FCC Radiation Exposure Statement:
This equipment complies with FCC radiation exposure limits set forth for an uncontrolled environment. This equipment should be installed and operated with minimum distance 20cm between the radiator & your body.
Caution
The product’s optimal temperature range is -20°C — 70°C.
Install the device near the rear-view mirror to obtain the best open-field view. Do NOT install the Dash Cam in a location that will obstruct your required driving view.
This device adopts build-in eMMC card, featuring high efficiency, stability, long use life. The eMMC card should be formatted via App or PC regularly to maximize the lifetime of the memory card.
Do not use any cardboard, paper towel, or napkins to clean the lens.
Do not attempt to repair, dismantle, or modify the Dash Camera hardware by yourself.
Do not install the product in an environment with high humidity, or combustible gases or liquids.
Drawings for illustration purpose only. Actual product may vary due to product enhancement.
Customer Support
For customer support and firmware updates please visit www.en.ddpai.com.
You can also email a Customer Support expert at feedback@ddpai.com.